Tuesday, 16 August 2011
Just Got Back
Hi everyone, just a quick note to let you know I've just got home after another wonderful holiday. This time we went to Paris for a few days. I'll share the photos with you as soon as I've got them sorted.
Thursday, 11 August 2011
Finished - But Not Quite Finished
I have now finished my Fair Isle cardigan - but I'm not completely happy with it.

 I love the colour combination, the Fair Isle pattern I have used and the overall style, but ... I'm the world's worst at not taking time out to check tension, measurements etc - and so the sleeves feel too tight. I should have picked this up earlier - but I tend to keep knitting away in a rush, assuming everything will be wonderful.
Also, I'm not too happy with the button bands - they are too stretchy which means they tend to gape.
So - a lesson learned - I will take more time to check the fit and styling, and do more swatches etc etc.
I'm going to reknit the sleeves, work on the button bands - and then hopefully it will be how I wanted it. When I'm happy with it, I'll share the pattern with you.
Wednesday, 10 August 2011
Tic-Tac-Toe
Isn't it great when something you see on someone else's blog inspires you. I love Tangled Happy's blog because Sara features and references lots of lovely ideas from other people's blogs. Not long ago she featured a lovely crocheted version of the game tic-tac-toe. The board doubles as a pouch to store the counters in.
Last night I felt inspired to make one for myself. Here it is.

 Very easy to make. I modified the edging to give a scalloped effect and made the button hole in the backing piece rather than the front piece. I used two smaller buttons for the closing rather than one bigger one.
 A great ideas for small children to take on holiday with them - also a great idea for bigger children to take on holiday with them!!
The pattern comes from Turtle Weenies blog and is available free here.
Last night I felt inspired to make one for myself. Here it is.


The pattern comes from Turtle Weenies blog and is available free here.
Tuesday, 9 August 2011
Family Treasure
I am currently working on tracing my family tree - great fun and very addictive. My Mum has just lent me a shoebox full of old family photos.
 Eve and I spent a wonderful evening studying them.
This one is our favourite.
 It is of my great grandparents, William Edward and Eliza Ann and their first-born son, Charlie, taken in about 1895.
We also loved this one of my Nan (on the right) and her cousin Dorothy, taken in 1929 - a couple of thoroughly modern gals.
 Dorothy's Louise Brooks hairstyle is lovely.
The photos really bring the family tree to life - real family treasure.

This one is our favourite.

We also loved this one of my Nan (on the right) and her cousin Dorothy, taken in 1929 - a couple of thoroughly modern gals.

The photos really bring the family tree to life - real family treasure.
Friday, 5 August 2011
For the Birthday Girl
Today is my MIL's birthday, still going strong at 87. Heres' the card I made for her.


Have a nice day everyone.

Lots of lovely layering and a few little jewels for sparkle.


The cake's in the oven, just about to pop around and see her. We're taking her out for a meal tonight - so no cooking for me!
Monday, 1 August 2011
Holiday in Bruges
We've just had 4 wonderful days in the town of Bruges in Belgium. We travelled by train down to London, caught the Eurostar to Lille and then were taken by coach to Bruges.
The holiday was part of an organised tour and so there were a lot of planned activities, but we were still left with plenty of free time to explore on our own. The town of Bruges is small and easy to walk around. It is a medieval town and extremely picturesque. There are a number of canals in the town which add to the beauty of the place. Here are some of our photos.


 We went on a canal boat trip...

...and watched the swans charging!!!
 One of the days was spent visiting the First World War sites and Tyne Cot Cemetery - the largest Commonwealth cemetery in the world. It was very moving and also very informative.
It is amazing to think that the town of Ieper (Ypres) was completely reduced to rubble and has now been restored.


 And of course we enjoyed the Belgium beer, chocolate and waffles.
 The last night of our stay we went to a music festival in one of the town squares.
 The featured band were The Selecter, a group I remembered from the late 1970s - yes, I even bought their single 'On My Radio' back in 1979!
We also managed to fit in a harp recital whilst we were there!
We saw so much it felt like we had been away for a week rather than just 4 days. It was a wonderful holiday, the Belgian people were so friendly and Bruges is a place I would definitely recommend for a visit.
The holiday was part of an organised tour and so there were a lot of planned activities, but we were still left with plenty of free time to explore on our own. The town of Bruges is small and easy to walk around. It is a medieval town and extremely picturesque. There are a number of canals in the town which add to the beauty of the place. Here are some of our photos.


...and watched the swans charging!!!

It is amazing to think that the town of Ieper (Ypres) was completely reduced to rubble and has now been restored.


We also managed to fit in a harp recital whilst we were there!
We saw so much it felt like we had been away for a week rather than just 4 days. It was a wonderful holiday, the Belgian people were so friendly and Bruges is a place I would definitely recommend for a visit.
Sunday, 31 July 2011
Just Back From Holiday
Hi, we've just got back from a wonderful holiday in Belgium. We stayed in Bruges, which is a lovely, picturesque town with numerous canals.
I'll post some pictures just as soon as I've got myself organised.
I'll post some pictures just as soon as I've got myself organised.
Saturday, 23 July 2011
My New Skirt
I haven't been able to find a skirt that I like in the shops - so I decided I would have a go at making one.
I didn't have a pattern so I used the skirts I already had as a basis for drawing up a pattern.
I bought some cheap cotton furnishing fabric - £1 per metre!! Something bold and jolly (nice curtains!)
 And this is what I got.

It consists of 6 tapered panels and a side zip - very basic but a good fit and the right length.
 The fabric isn't too light, so it will be wearable through to the autumn, but it's colourful enough for a summer skirt.
 I already had a zip, the fabric cost a total of £2 - so how's that for cheap and cheerful! It only took a couple of days to make up and hem. I'm very pleased with the end result. I shall have to find some other interesting fabrics and make some more.
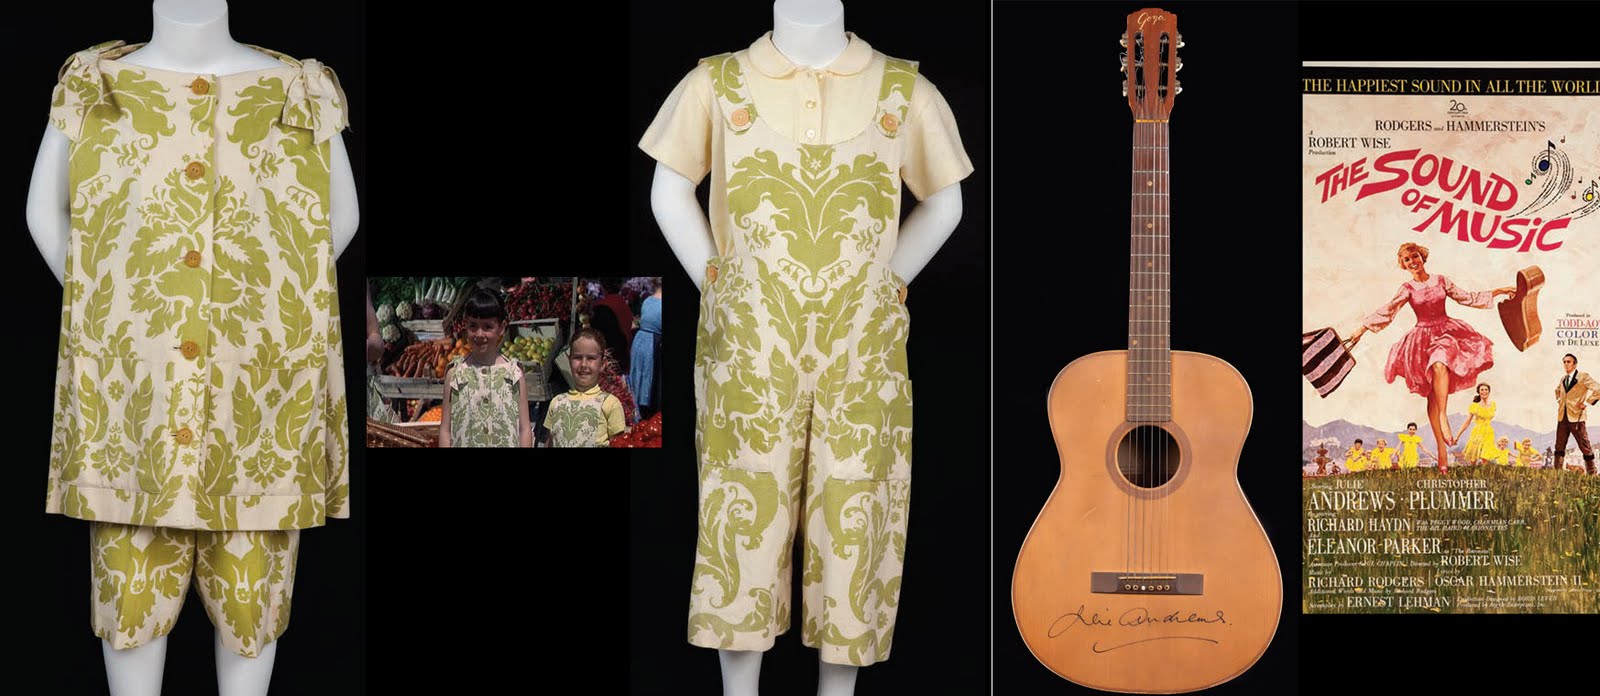
As I was coming downstairs to show the finished article off to the rest of the family - I suddenly had an image in my head from my favourite film of the von Trapp children in their 'playsuits' made from curtain fabric.


 Obviously their curtains weren't as colourful as mine. The outfits from the film worn by Marta and Gretel (in the picture above) recently sold at auction for $35,000 - if I look after my skirt, in a few years time it could be worth something - vintage and all that!!
I didn't have a pattern so I used the skirts I already had as a basis for drawing up a pattern.
I bought some cheap cotton furnishing fabric - £1 per metre!! Something bold and jolly (nice curtains!)


It consists of 6 tapered panels and a side zip - very basic but a good fit and the right length.


As I was coming downstairs to show the finished article off to the rest of the family - I suddenly had an image in my head from my favourite film of the von Trapp children in their 'playsuits' made from curtain fabric.


Tuesday, 19 July 2011
Farewell Harry
We went to see the last Harry Potter film last night.
![]() We really enjoyed it, Eve was quite tearful that it was all over. Both Grace and Eve have grown up with Harry - he's been a major part of their lives - queuing up for the books as soon as they are published, seeing all the films as soon as they come out, then buying the DVD on the day of release.
We really enjoyed it, Eve was quite tearful that it was all over. Both Grace and Eve have grown up with Harry - he's been a major part of their lives - queuing up for the books as soon as they are published, seeing all the films as soon as they come out, then buying the DVD on the day of release.
Neville Longbottom was the star of the show, such bravery and all whilst wearing a rather nice Fair Isle cardi.
![]()
So that's it now - Harry's all grown up - all finished. Just the final DVD to wait for now.

Neville Longbottom was the star of the show, such bravery and all whilst wearing a rather nice Fair Isle cardi.
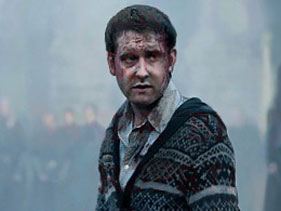
I was a bit nervous about the final scene - 19 years later - could they pull it off? Actually it worked quite well. Harry and Ron were believable, Jinny didn't look any different - only Draco Malfoy raised a snigger in the cinema.
Monday, 18 July 2011
Fully PDF-ed
I've worked hard today and now all my patterns are available as free Ravelry downloads. I have also linked all the pattern pages on this blog to the download (Grace showed me how to do it!) I feel very organised.
Please let me know if there is a probelm with any of the links.
Please let me know if there is a probelm with any of the links.
Saturday, 16 July 2011
Rain and Golf
A few weeks ago I made this cute little raindrop.
![]() I forgot to blog him - probably because the sun was shining so he looked out of place. But today the rain has arrived, so my little raindrop is happy, staring out of the window at his fellow raindrops.
I forgot to blog him - probably because the sun was shining so he looked out of place. But today the rain has arrived, so my little raindrop is happy, staring out of the window at his fellow raindrops.
![]() The pattern is by Sherry M and is called Rain Droplet in Red Galoshes. The pattern is available for free, here. I got a bit lost on the instructions for the galoshes, so in the end I made it up.
The pattern is by Sherry M and is called Rain Droplet in Red Galoshes. The pattern is available for free, here. I got a bit lost on the instructions for the galoshes, so in the end I made it up.
My little raindrop is sitting beside me as I work away. Whether it is sunny or raining, this weekend I will be in front of the television watching the Open Golf Championship. At the moment, there are so many people in contention - it could be a close run thing. My weekend knitting will be the Fair Isle cardi I'm designing.
![]() I'm making good progress - back finished, half of left front done. Golf and knitting - should be a good weekend. Enjoy yours - whatever you are doing.
I'm making good progress - back finished, half of left front done. Golf and knitting - should be a good weekend. Enjoy yours - whatever you are doing.


My little raindrop is sitting beside me as I work away. Whether it is sunny or raining, this weekend I will be in front of the television watching the Open Golf Championship. At the moment, there are so many people in contention - it could be a close run thing. My weekend knitting will be the Fair Isle cardi I'm designing.

Wednesday, 13 July 2011
Errol
I started knitting a new bear in February - it was supposed to be ready for my birthday in March - but too many projects, too little time - he was never finished.
It was one of those projects where you keep saying, "I must get around to finishing that" - but you never do.
Well yesterday I decided I would do some work on my bear, make some progress. When I opened the knitting bag I was surprised how much I had already done - in fact the bear was finished apart from sewing on the arms and legs. So here he is, thankfully freed from the knitting bag and all complete.
![]()
![]() His name is Errol and he is boisterous little boy, full of fun and mischief.
His name is Errol and he is boisterous little boy, full of fun and mischief.
It was difficult to get him to sit still for the photos!
![]() The pattern comes from Claire Garland's wonderful book called 'Knitted Bears'.
The pattern comes from Claire Garland's wonderful book called 'Knitted Bears'.
![]() The bears in this book all have so much personality and are not difficult to make - they also shouldn't take several months to make - I'm not usually that bad at finishing a project off. He's made with double knitting weight yarn and the actual bear took less than 1 x 50g ball. The clothes are really cute - a shirt and dungerees.
The bears in this book all have so much personality and are not difficult to make - they also shouldn't take several months to make - I'm not usually that bad at finishing a project off. He's made with double knitting weight yarn and the actual bear took less than 1 x 50g ball. The clothes are really cute - a shirt and dungerees.
Here is a picture of Errol with his little sister Rosie, who I made at the beginning of 2010.
![]() Maybe next year I'll add another bear to the family.
Maybe next year I'll add another bear to the family.
It was one of those projects where you keep saying, "I must get around to finishing that" - but you never do.
Well yesterday I decided I would do some work on my bear, make some progress. When I opened the knitting bag I was surprised how much I had already done - in fact the bear was finished apart from sewing on the arms and legs. So here he is, thankfully freed from the knitting bag and all complete.


It was difficult to get him to sit still for the photos!


Here is a picture of Errol with his little sister Rosie, who I made at the beginning of 2010.

Tuesday, 12 July 2011
Eagle
Yesterday afternoon I had a little making session and made this cute little eagle.
![]() It only took a few hours to make and was easy to do.
It only took a few hours to make and was easy to do.
I made it to surprise Grace when she came home from work. It's actually her own pattern, so she was really thrilled when she saw I had made it. You can find the pattern on her blog, The Smiling Robot, here for free.
![]() She hasn't made any of my patterns yet - something I pointed out to her - no harm in giving her a guilty conscience!!
She hasn't made any of my patterns yet - something I pointed out to her - no harm in giving her a guilty conscience!!
I haven't given the eagle a name yet - lacking inspiration - so at the moment he is just 'Eagle'.

I made it to surprise Grace when she came home from work. It's actually her own pattern, so she was really thrilled when she saw I had made it. You can find the pattern on her blog, The Smiling Robot, here for free.

I haven't given the eagle a name yet - lacking inspiration - so at the moment he is just 'Eagle'.
Sunday, 10 July 2011
Marcus Pattern
PDF version
A fitted men’s sweater with Fair Isle pattern.
![]()
Materials
I used Sirdar Balmoral wool, silk,alpaca mix double knitting yarn (125m/135yds per ball).
9 (9) x 50g balls in main shade in black (ms).
1 x 50g ball in grey (cs1)
1 x 50g ball in navy (cs2)
1 x 50g ball in dark red (cs3)
1 x 50g ball in cream (cs4)
3.75mm (US 5) straight needles
4mm (US 6) straight needles
3.25mm (US 3) straight needles
Tension
22 sts and 31 rows to 10cm (4 inches) measured over plain stocking stitch using 3.75 mm needles.
Abbreviations
k = knit
p = purl
sts = stitches
tog = together
tbl = through back of loops
ms = main shade
cs = contrast shade
RS = right side
WS = wrong side
RH = right hand
![]() BACK
BACK
Using 3.25mm needles and ms, cast on 116 (128) sts.
Row 1 (RS): (k2, p2) to end.
This row forms the rib. Repeat this row until work measures 6 cm, ending with a WS row and increasing 1 st at the end of the last row. 117 (129) sts
Change to 3.75mm needles and work in stocking stitch until work measures 31 cm.
Change to 4mm needles and work from chart to row 38, joining in and breaking off colours as required.
![]()
Shape armholes
Cast off 6 sts at the beginning of the next 2 rows (rows 39 and 40 of chart). 105 (117) sts
Decrease 1 st at each end of next 9 rows (up to and including row 49 of chart). 87 (99) sts
Complete last two rows of chart. *
Change back to 3.75mm needles and working in ms and stocking stitch continue straight until armhole measures 23 (25) cm.
Shape shoulders
Cast off 7 (8) sts at beg of next 2 rows.
Cast off 7(8) sts at beginning of next row and then knit until 12 sts are on RH needle, turn.
Working on 12 sts only, cast off 4 sts at beg of next row, purl to end.
Cast off remaining 8 sts.
With RS facing, place centre 35 (43) sts on a holder. Rejoin yarn to remaining 19 (20) sts, knit to end.
Cast off 7 (8) sts at beg of next row.
Cast off 4 sts at beginning of next row.
Cast off remaining 8 sts.
FRONT
Work as given for back to * (end of chart). Change back to 3.75mm needles and working in ms and stocking stitch continue straight until you have worked 20 rows less than on back to start of shoulder shaping.
With RS facing for next row, knit until there are 35 (37) sts on RH needle, turn, leaving remaining sts on a spare needle. Working on 35 (37) sts only, cast off 3 sts at beg of next row. 32 (34) sts
Decrease 1 st at neck edge on next 5 rows. 27 (29) sts
Dec 1 st at neck edge on 4 following alternate rows. 23 (25) sts
Dec 1 sts at neck edge on following 4th row. 22 (24) sts
Work a row, ending with a WS row.
Shape shoulders
Cast off 7 (8) sts at beg of next row and following alternate row.
Work 1 row.
Cast off remaining 8 sts.
With RS facing, place centre 17 (25) sts on a holder. Rejoin yarn to remaining 35 (37) sts and knit to end.
Complete to match first side, reversing shaping.
![]() SLEEVES
SLEEVES
With 3.25 needles and ms, cast on 60 (64) sts.
Row 1 (RS): (k2, p2) to end.
This row forms the rib. Repeat this row until work measures 6 cm, ending with a WS row and increasing 1 st at the end of the last row. 61 (65) sts
Change to 3.75mm needles and commence stocking stitch, work 2 rows.
Increase 1 st at each end of next row and 10 following 6th rows, and then on 5 (6) following 5th rows. 93 (99) sts
Continue straight until work measures 35 (37) cm.
Change to 4mm needles and work from chart to row 38, joining in and breaking off colours as required.
NOTE - the pattern for the medium/large sleeve has to accommodate the extra stitches into the pattern and so has a different starting and finishing point within the chart.
Shape sleeve top
Cast off 6 sts at beginning of next two rows. (rows 39 and 40 of chart)
Decrease 1 st at each end of next 5 rows. (up to and including chart row 45)
Dec 1 st at each end of next 3 (4) alternate rows. (up to and including chart row 51). 65 (69) sts
Change back to 3.75mm needles and working in ms and stocking stitch, dec 1 st at each end of following 4th row.
Dec 1 st at each end of next 12 (13) alternate rows.
Dec 1 sts at each end of next 5 (6) rows.
Cast off remaining 29 sts.
![]() NECKBAND
NECKBAND
Join right shoulder seam.
With 3.25mm needles and RS facing, pick up and knit 22 sts down right front neck, knit across 17 (25) sts on holder, pick up and knit 22 sts up left front, pick up 4 sts from back left neck edge, knit across 35 (43) sts on holder, pick up and knit 4 sts from back right neck edge. 104 (120) sts
Work in K2 P2 rib for 10 rows. Cast off.
MAKING UP
Fasten off and neaten all loose ends. Join left hand shoulder seam. Set in sleeves and sew up sleeve and side seams.
A fitted men’s sweater with Fair Isle pattern.

It is knitted in the flat with double knitting weight yarn.
To fit sizes small/medium, (medium/ large)
Knitted sizes
Chest 102 (112) cm / 40(44) inches
Length to shoulder 66(68)cm / 26(27)inches
Sleeve seam 51(53) cm / 20(21) inches
(Please note that I have only knitted up the small/medium size. The medium/large size pattern hasn't been tested by me.)
I used Sirdar Balmoral wool, silk,alpaca mix double knitting yarn (125m/135yds per ball).
9 (9) x 50g balls in main shade in black (ms).
1 x 50g ball in grey (cs1)
1 x 50g ball in navy (cs2)
1 x 50g ball in dark red (cs3)
1 x 50g ball in cream (cs4)
3.75mm (US 5) straight needles
4mm (US 6) straight needles
3.25mm (US 3) straight needles
Tension
22 sts and 31 rows to 10cm (4 inches) measured over plain stocking stitch using 3.75 mm needles.
Abbreviations
k = knit
p = purl
sts = stitches
tog = together
tbl = through back of loops
ms = main shade
cs = contrast shade
RS = right side
WS = wrong side
RH = right hand

Using 3.25mm needles and ms, cast on 116 (128) sts.
Row 1 (RS): (k2, p2) to end.
This row forms the rib. Repeat this row until work measures 6 cm, ending with a WS row and increasing 1 st at the end of the last row. 117 (129) sts
Change to 3.75mm needles and work in stocking stitch until work measures 31 cm.
Change to 4mm needles and work from chart to row 38, joining in and breaking off colours as required.

Shape armholes
Cast off 6 sts at the beginning of the next 2 rows (rows 39 and 40 of chart). 105 (117) sts
Decrease 1 st at each end of next 9 rows (up to and including row 49 of chart). 87 (99) sts
Complete last two rows of chart. *
Change back to 3.75mm needles and working in ms and stocking stitch continue straight until armhole measures 23 (25) cm.
Shape shoulders
Cast off 7 (8) sts at beg of next 2 rows.
Cast off 7(8) sts at beginning of next row and then knit until 12 sts are on RH needle, turn.
Working on 12 sts only, cast off 4 sts at beg of next row, purl to end.
Cast off remaining 8 sts.
With RS facing, place centre 35 (43) sts on a holder. Rejoin yarn to remaining 19 (20) sts, knit to end.
Cast off 7 (8) sts at beg of next row.
Cast off 4 sts at beginning of next row.
Cast off remaining 8 sts.
FRONT
Work as given for back to * (end of chart). Change back to 3.75mm needles and working in ms and stocking stitch continue straight until you have worked 20 rows less than on back to start of shoulder shaping.
With RS facing for next row, knit until there are 35 (37) sts on RH needle, turn, leaving remaining sts on a spare needle. Working on 35 (37) sts only, cast off 3 sts at beg of next row. 32 (34) sts
Decrease 1 st at neck edge on next 5 rows. 27 (29) sts
Dec 1 st at neck edge on 4 following alternate rows. 23 (25) sts
Dec 1 sts at neck edge on following 4th row. 22 (24) sts
Work a row, ending with a WS row.
Shape shoulders
Cast off 7 (8) sts at beg of next row and following alternate row.
Work 1 row.
Cast off remaining 8 sts.
With RS facing, place centre 17 (25) sts on a holder. Rejoin yarn to remaining 35 (37) sts and knit to end.
Complete to match first side, reversing shaping.

With 3.25 needles and ms, cast on 60 (64) sts.
Row 1 (RS): (k2, p2) to end.
This row forms the rib. Repeat this row until work measures 6 cm, ending with a WS row and increasing 1 st at the end of the last row. 61 (65) sts
Change to 3.75mm needles and commence stocking stitch, work 2 rows.
Increase 1 st at each end of next row and 10 following 6th rows, and then on 5 (6) following 5th rows. 93 (99) sts
Continue straight until work measures 35 (37) cm.
Change to 4mm needles and work from chart to row 38, joining in and breaking off colours as required.
NOTE - the pattern for the medium/large sleeve has to accommodate the extra stitches into the pattern and so has a different starting and finishing point within the chart.
Shape sleeve top
Cast off 6 sts at beginning of next two rows. (rows 39 and 40 of chart)
Decrease 1 st at each end of next 5 rows. (up to and including chart row 45)
Dec 1 st at each end of next 3 (4) alternate rows. (up to and including chart row 51). 65 (69) sts
Change back to 3.75mm needles and working in ms and stocking stitch, dec 1 st at each end of following 4th row.
Dec 1 st at each end of next 12 (13) alternate rows.
Dec 1 sts at each end of next 5 (6) rows.
Cast off remaining 29 sts.

Join right shoulder seam.
With 3.25mm needles and RS facing, pick up and knit 22 sts down right front neck, knit across 17 (25) sts on holder, pick up and knit 22 sts up left front, pick up 4 sts from back left neck edge, knit across 35 (43) sts on holder, pick up and knit 4 sts from back right neck edge. 104 (120) sts
Work in K2 P2 rib for 10 rows. Cast off.
MAKING UP
Fasten off and neaten all loose ends. Join left hand shoulder seam. Set in sleeves and sew up sleeve and side seams.
Subscribe to:
Posts (Atom)