This pattern is for a crochet lacy doily that incorporates a band of pansies in the design.

This pattern is based on a doily I made nearly 30 years ago, see earlier post.
The original doily had alternating colours (pale blue and yellow) for the centres of the flowers but the same colour (pink) for the outer petals. In my updated version I have used just two colours – blue and yellow, alternating these between the centres and the outer petals. The choice of colours and how you use them are entirely up to you.
Crochet cotton in white, green and choice of colours for the flowers. I used Coats crochet cotton #12
Hook size 1.75mm
Please note that English crochet terms are used throughout-
tr = USA dc
dc = USA sc
htr = USA hdc
dtr = USA tr
Special abbreviation
tr3(4)tog = *yarn over hook, insert hook in next stitch, yarn over hook, draw loop through, yarn over hook, draw through 2 loops (2 loops left on hook)* yarn over hook, insert hook into next stitch, yarn over hook, draw loop through, yarn over hook, draw through 2 of the loops on the hook, (3 loops left on the hook) rep from 8 1 (2) times more (4 (5) loops on hook), yarn over hook and draw through all the loops on the hook.
Central motif
With white ch 8. Join into a ring with a sl st.
Round 1: 3 ch (counts as first tr), 31 tr into ring. Join with a sl st into 1st tr. [32 sts]
Round 2: 3 ch (counts as 1st tr), 1 tr into each tr to end. Join with a sl st into 1st tr.
Round 3: (3ch, 1 tr into next 2 tr, 3ch, sl st into next tr, sl st into next tr) 7 times, 3ch, 1 tr into next 2 tr, 3ch, sl st into next tr, sl st into 1st chain at start of round.
Round 4: sl st into next 2 ch, 3 ch (counts as 1st tr), 1 tr into next 2 tr, 1 tr into top of 3 ch, 6 ch, (1 tr into top of next 3 ch, 1 tr into next 2 tr, 1 tr into top of next 3 ch, 6 ch) 7 times, sl st into top of 1st tr.
Round 5: 3 ch (counts as 1st tr), 1 tr into next 3 tr, 3ch, miss 2 ch, 1 tr into next ch, 3 ch, 1 tr into next ch, 3 ch, miss 2 ch, (1 tr into next 4 tr, 3ch, miss 2 ch, 1 tr into next ch, 3 ch, 1 tr into next ch, 3 ch, miss 2 ch) 7 times, sl st into top of 1st tr.
Round 6: 3 ch, tr3tog over next 3 tr, 5 ch, miss 1st ch sp, 4 tr into next ch sp, 5 ch, miss next ch sp (tr4tog over next 4 tr, 5 ch, miss 1st ch sp, 4 tr into next ch sp, 5 ch, miss next ch sp)7 times, sl st into top of 1st tr cluster.
Round 7: (1 dc into top of cluster, 9 ch, miss next ch sp, tr4tog over next 4 tr, 9 ch, miss next ch sp) 8 times, sl st into 1st dc.
Round 8: sl st into next 5 ch, 1 dc into ch sp, (10 ch, 1 dc into next ch sp) 15 times, 10 ch, sl st into 1st dc. [16 ch sp]
Round 9: sl st into next 5 ch, 1 dc into ch sp, (12 ch, 1 dc into next ch sp) 15 times, 12 ch, sl st into 1st dc.
Round 10: sl st into next 6 ch, 1 dc into ch sp, (14 ch, 1 dc into next ch sp) 15 times, 14 ch, sl st into 1st dc.
Fasten off. Neaten loose ends.
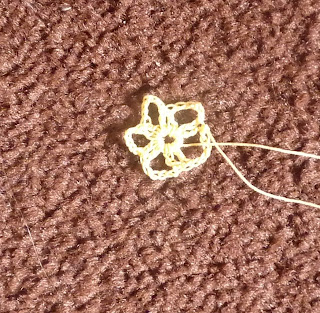
 Pansy centre
Make 16
With colour of choice make 5 ch. Join into a ring with a sl st.
Ch 3 (counts as 1st tr), (1 tr, 5ch, 1 tr) 4 times, 1 tr, 5 ch, all into ring. Sl st into top of 1st tr.
 Fasten off.
Outer petals (this is the joining round in which the pansies are joined to the central motif).
Using different colour, join yarn to right-hand side of any ch sp of flower centre.
(1 dc, 1 htr, 1 tr, 7 dtr, 1 tr, 1 htr, 1 dc) into ch sp, (1 dc , 1 htr, 5 tr, 1 htr, 1 dc) into next ch sp, (1 dc, 1 htr, 3 tr) into next ch sp, sl st into a 14 ch sp on the central motif, (3 tr, 1 htr, 1 dc) into same ch sp on petal as before, (1 dc , 1 htr, 5 tr, 1 htr, 1 dc) into next ch sp, (1 dc, 1 htr, 1 tr, 7 dtr, 1 tr, 1 htr, 1 dc) into next ch sp, sl st into 1st dc
 Fasten off. Neaten all loose ends.
Join each pansy to the central motif in this way. The pansies are not joined to each other at this point.

Greenery (this is a joining round in which the pansies are joined together).
Using green join yarn to 1st dtr on top right hand petal of any pansy.
 1 dc into same st, *(1 ch, 1 dc) into next 19 sts,
  1 tr into middle tr of next petal of same pansy, 1 tr into middle tr of right hand small petal on next pansy, 1 dc into 1st dtr on top right hand petal of this pansy, repeat from * 14 times more, (1 ch, 1 dc) into next 19 sts, 1 tr into middle tr of next petal of same pansy, 1 tr into middle tr of right hand small petal on next pansy, sl st into 1st dc. Fasten off and neaten loose ends.
  The doily could be finished off at this point, without doing the edging rounds.
 Edging
1st round: with white, join yarn to ch sp between 4th and 5th dc, counting from the right, on any petal,

1 dc into same sp, (5 ch, miss 2 ch sps 1 dc into next ch sp, 5 ch, miss next 5 ch sps 1 dc into next ch sp, miss 2 ch sps 1 dc into next ch sp, 5 ch, 1 dc into ch sp between 4th and 5th dc of next petal) 15 times, 5 ch, miss 2 ch sps 1 dc into next ch sp, 5 ch, miss next 5 ch sps 1 dc into next ch sp, miss 2 ch sps 1 dc into next ch sp, 5 ch, sl st into 1st dc.
2nd round: sl st into next 3 ch, 1 dc into same ch sp, ([ 5 ch, 1 dc into next ch sp] twice, 3 ch, 7 tr into next ch sp, 3 ch, 1 dc into next ch sp) 15 times, [ 5 ch, 1 dc into next ch sp] twice, 3 ch, 7 tr into next ch sp, 3 ch, sl st into 1st dc.
3rd round: sl st into next 3 ch, 1 dc into same ch sp, (5ch, 1 dc into next ch sp, 5ch, miss next ch sp, 1 tr into next 7 tr, 5 ch, miss next ch sp, 1 dc into next ch sp) 15 times, 5ch, 1 dc into next ch sp, 5ch, miss next ch sp, 1 tr into next 7 tr, 5 ch, miss next ch sp, sl st into 1 st dc.
4th round: sl st into next 3 ch, 1 dc into same ch sp, (4 ch, 1 dc into next ch sp, 2 ch, 2 tr into next tr, 1 tr into next 2 tr, (1 tr, 2 ch, 1 tr) into next tr, 1 tr into next 2 tr, 2 tr into last tr, 2 ch, 1 dc into next ch sp, 4 ch, 1 dc into next ch sp) 15 times, 4 ch, 1 dc into next ch sp, 2 ch, 2 tr into next tr, 1 tr into next 2 tr, (1 tr, 2 ch, 1 tr) into next tr, 1 tr into next 2 tr, 2 tr into last tr, 2 ch, 1 dc into next ch sp, 4 ch, sl st into 1st dc.
5th round: sl st into next 3 ch, 1 dc into same ch sp, (4 ch, miss next ch sp, 2 tr in next tr, 1 tr in next 4 tr, 2 ch, 1 tr into ch sp, 2 ch, 1 tr into next 4 tr, 2 tr into last tr, 4 ch, miss next ch sp, 1 dc into next ch sp, 4 ch, 1 dc into next ch sp) 15 times, 4 ch, miss next ch sp, 2 tr in next tr, 1 tr in next 4 tr, 2 ch, 1 tr into ch sp, 2 ch, 1 tr into next 4 tr, 2 tr into last tr, 4 ch, miss next ch sp, 1 dc into next ch sp, 4 ch, sl st into 1st dc.
6th round: sl st into next 4 ch and into 1 st tr, 3 ch (counts as 1st tr), 1 tr into next 5 tr, (2 ch, 1 tr into ch sp, 2ch, miss central tr, 1 tr into next ch sp, 2 ch. 1 tr into next 6 tr, 3 ch, miss next ch sp, 1 dc into middle ch sp, 3 ch, miss next ch sp, 1 tr into next 6 tr) 15 times, 2 ch, 1 tr into ch sp, 2ch, miss central tr, 1 tr into next ch sp, 2 ch. 1 tr into next 6 tr, 3 ch, miss next ch sp, 1 dc into middle ch sp, 3 ch, miss next ch sp, sl st into top of 1st tr.
7th round: 3 ch (counts as 1st tr), 1 tr into next 5 tr, ([4 tr into next ch sp] 3 times, 1 tr into next 6 tr, 3 ch, miss 2 ch sps, 1 tr in next 6 tr) 15 times, [4 tr into next ch sp] 3 times, 1 tr into next 6 tr, 3 ch, miss 2 ch sps, sl st into 1 st tr.
8th round: 3 ch (counts as 1st tr), tr3tog over next 3 tr, [5 ch, tr4tog over next 4 tr, ] 5 times, 2 ch, 1 dc, 2 ch, *(tr4tog over next 4 tr, [5 ch, tr4tog over next 4 tr, ] 5 times, 2 ch, 1 dc, 2 ch, repeat from * 14 times more, sl st into top of 1st cluster.
Fasten off, neaten all loose ends and block.

Wow! Thank you sooo much for the pattern, I can't wait to try it out. x
ReplyDeleteVery pretty! Great work.
ReplyDeleteThank you for the extra re-work pattern AND detailed instructions on how to complete it.
ReplyDeleteSir Napsalot
(I made the request for this pattern from your trinket box)
What a beautiful doily! Thank you so much!
ReplyDeleteI think the new one is even prettier than the original! :)
ReplyDeleteLove this! I think I will make this one as a gift for my neighbors!
ReplyDeletebeautiful pattern can not wait to make it. I am just Hooked(no pun intended) on doily patterns. thank you!!
ReplyDeleteThis is so beautiful and I just love your detailed instructions on making it. Thanks!!!
ReplyDeleteBeautiful!!!
ReplyDeleteque hermoso paño se ve tan delicado'' me encanta
ReplyDelete¡¡¡tienes unas lindas manos¡¡
lidia de chile
what does tr stand for?
ReplyDeleteEJ
Hi,
ReplyDeleteThe pattern is written using English crochet terms rather than American. tr stands for treble which is the same as the American dc. I hope this helps.
I join everyone in thanking you for posting this pattern. I've enjoyed making it and now it gives me great pleasure to look at it.
ReplyDeletewith warm regards from downunder New Zealand,
Jade
Thank you Jade and everyone else for your kind words - it is always a pleasure to share.
ReplyDeleteVery nice craft!! I want to try to make it too =) Thanks for sharing!
ReplyDeleteWhat a beautiful doily! Thank you. :)
ReplyDelete______
Lee Ann H
Crochet...Gotta Love It! Blog
Crochet...Gotta Love It! Website (crochet names and rosary patterns)
Is the English size #12 thread the same as American size #10 ? If not what is it close to ? Thank you for your help.
ReplyDeleteI can't wait to get started on it. Thank you for the pattern.
They are very close in thickness so no problem using #10. Make sure your hook size is right for the thread.
DeleteJanet,
ReplyDeleteThank you so much for replying. I had started the doily last night. I have two pansies attached so far. Thank you again for the pattern.
Tamara
I have never crocheted a doily in my life, but this one is too beautiful not to try! Thank you! Hmmm... My Mom's Christmas present?
ReplyDeleteit;s very beautiful work , thank you for pattern. samia from eygpet
ReplyDeleteLoving this doily. Its has been a very long time since I had made one, this one is the most pretty I have ever seen.
ReplyDeletehttp://www.craftsy.com/user/662360/pattern-store
A little lost on how to add the edging on to this doily. Do you have a close up picture of the section where you are starting the edging, with a complete section that you repeat throughout this edging?
ReplyDeleteI'm sorry I don't have any other photos of the doily other than those in the pattern.
DeleteJust wanted to say thankyou for the wonderful pattern, I've posted my result here- http://miscellaneousmaking.wordpress.com/2013/02/06/birthday-pansy-doily/
ReplyDeleteEveryone loved the doily, I think I may have to make a few more as gifts!
Sally
very pretty
ReplyDeleteThank you so much for the pattern.
ReplyDeleteI think this doily is beautiful. Never seen one more beautiful than this one. I certainly will start this one today!
ReplyDeleteThanks for sharing.
Stephanie
This is beautiful. Thank you for taking the time to reproduce the pattern. This will be the first doily I've ever attempted, I think!
ReplyDeleteI'm a visual learner but read directions well. Both written directions and your pictures are great! And thank you for the translation from the UK to US terms. I've been crocheting 40+ years and think I'll finally try a pansy doily :)
ReplyDeleteI love to crochet I've been crocheting for a while I crochet rose, and daisy, afghans,
ReplyDeleteI've seen a lot of patterns but I never saw anything as beautiful as the pansy doily. Thank you for sharing you're beautiful pansy doily with us
Thank you for your lovely message. I'm so glad you like the pattern. I do so enjoy being able to share with everyone.
DeleteI love this pattern and other Doilies patterns you have how can I get the patterns
ReplyDeleteThe pdf for this pattern is available at the top of this post. There are hundreds of other doily patterns on Ravelry - that's where I get mine. And most of them are free!
ReplyDeleteHi Janet
ReplyDeleteThis is a beautiful pattern. Is gauge important?
Thanks
Hi, glad you like the pattern. Gauge isn't important. Use whatever size hook works with your yarn.
DeleteReally great pattern.. Will definitely try it out
ReplyDelete