Tuesday, 12 January 2010

Snow, Ice and bits and pieces

The weather where I live is usually quite mild. Here in Liverpool we don't tend to get the harsh weather that the rest of the country suffers - until last week!


Very picturesque.

Over the Christmas holidays we had watched 'The Proposal' - the latest Sandra Bullock comedy.


It was great - I really enjoyed it. It was largely set in Alaska, and I noticed a significant number and variety of woolly sweaters - Alaska seems a good place to live to get the most out of your knitting projects.
The novelty of the snow wore off after a few hours, when everything turned to ice (maybe I won't move to Alaska just yet!). Eve was thrilled - school was closed. Even the university was closed. I was supposed to be getting everyone back to school and work, but instead they remained under my feet!

Eve was very disappointed this Sunday when a message was posted on the school website saying that her year had to return to school on Monday, but the other years could remain at home.
So I decided to make her some cakes for when she got home - to cheer her up.
I had planned to prepare a little party for her, but the ice but a stop to that. I had walked with Eve to school in the morning, to keep her company. However on the way back home, without Eve to link arms with, I managed to slip right over and ended up lying in a heap on the pavement, swearing profusely.

Fortunately, nothing is broken, but I do have a rather bruised behind and I am far too stiff and aching to do any housework for a few days! So Eve's little party was reduced to a few cakes - but she appreciated it anyway.

Sitting feeling sorry for myself yesterday afternoon, I made a lavender filled heart for Eve's wardrobe.
The pattern is from the February issue of 'Simply Knitting' magazine.
I also made a pink lacy mat.

It is actually a snowflake pattern from MYpicot. I had made one at Christmas time but it was too big as a tree decoration. This one I made in 4ply cotton and it is approximately 20 cm wide. It makes a nice mat to sit under a bowl or something.

I always find that when I'm busy I can always find time to make something completely trivial. Before Christmas I knitted 24 little squares (about 2.5 cm square) using oddments of 4 ply yarn and sewed a button to each. I used them as tags for the advent calendar. Since Christmas I have turned the squares into a length of bunting. It is now hanging in the porch, over the entrance to the hallway. Silly but it's the little details that make all the difference.
Finally for now, I have received my study material for my next Open University course. I always get excited when a new course begins - I love the discipline, I love learning new things and I love the challenge. This is my 16th course with the OU. It is called Our Dynamic Planet: Earth and Life. Nobody else in the house is excited about the topic, but I think it's wonderful. Must go now and start working through my study books - the course doesn't officially start until 6th February - but why wait?

Monday, 11 January 2010

Hedgehog Barbie

If Barbie was a hedgehog, this is what she would look like.

I had some 'pink' feather yarn lying around and Barbie came to mind, so I used my Heidi Hedgehog pattern. She only took an hour to make and is now very good friends with the original Heidi - fashion advice, make-up tips and all that!

Sunday, 10 January 2010

Charlotte

PDF version
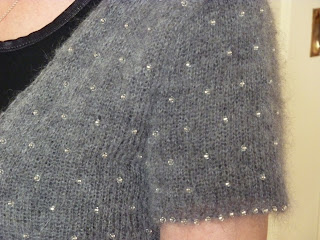
Charlotte is a snug cardi, knitted in aran-weight yarn. It has a scoop neck and a patterned border on the body. It is quick to knit and very comfortable to wear.


One size only. To fit size small 32”

Knitted size
Bust 84 cm / 33 inches
Length to shoulder 46 cm / 18 inches
Sleeve seam 46 cm / 18 inches

Materials
8 balls of Aran weight yarn (I used Debbie Bliss Donegal Aran Tweed – 88 metres / 96 yards per ball)
6 buttons
5mm and 4.5mm needles (US 8 and 7)

Tension
16 sts and 22 rows to 10cm (4 inches) measured over stocking stitch using 5 mm needles.

Abbreviations
k = knit
p = purl
sts = stitches
sl = slip
tog = together
tbl = through back of loop
psso = pass the slipped stitch over
yon = yon over needle
beg = beginning
alt = alternate

BACK
With 5mm needles cast on 61 stitches.
K 2 rows.

Work pattern border as follows:
Row 1: k2tog, k4, yon, k1, (yon, k4, sl1 k2tog psso, k4, yon, k1) 4 times, yon, k4, sl1 k1 psso.
Row 2 and all even numbered rows: purl.
Row 3: k2tog, k3, yon, k3, (yon, k3, sl1 k2tog psso, k3, yon, k3) 4 times, yon, k3, sl1 k1 psso.
Row 5: k2tog, k2, yon, k5, (yon, k2, sl1 k2tog psso, k2, yon, k5) 4 times, yon, k2, sl1 k1 psso.
Row 7: k2tog, k1, yon, k7, (yon, k1, sl1 k2tog psso, k1, yon, k7) 4 times, yon, k1, sl1 k1 psso.
Row 9: k2tog, yon, k9, (yon, sl1 k2tog psso, yon, k9) 4 times, yon, sl1 k1 psso.
Row 11: k2, (yon, sl1 k1 psso, k5, k2tog, yon, k3) 4 times, yon, sl1 k1 psso, k5, k2tog, yon, k2.
Row 13: k3, (yon, sl1 k1 psso, k3, k2tog, yon, k5) 4 times, yon, sl1 k1 psso, k3, k2tog, yon, k3.
Row 15: k4, (yon, sl1 k1 psso, k1, k2tog, yon, k7) 4 times, yon, sl1 k1 psso, k1, k2tog, yon, k4.
Row 17: k5, (yon, sl1 k2tog psso, yon, k9) 4 times, yon, sl1 k2tog psso, yon, k5.
Row 19: k3, (k2tog, yon, k3, yon, sl1 k1 psso, k5) 4 times, k2tog, yon, k3, yon, sl1 k1 psso, k3.
Row 21: k2, (k2tog, yon, k5, yon, sl1 k1 psso, k3) 4 times, k2tog, yon, k5, yon, sl1 k1 psso, k2.
Row 23: k1, (k2tog, yon, k7, yon, sl1 k1 psso, k1) 4 times, k2tog, yon, k7, yon, sl1 k1 psso, k1.
Row 25: k2tog, (yon, k9, yon, sl1 k2tog psso) 4 times, yon, k9, yon, sl1 k1 psso.
Row 27: k12 (yon, k2tog, k10) 3 times, yon, k2tog, k11.
Row 28: purl.

This completes the patterned border. Continue in stocking stitch until works measures 27 cm.

Shape armholes
Cast off 4 sts at the beg of the next 2 rows.
Dec 1 st at each end of next 2 rows.
Dec 1 st at each end of next alt row. (47 sts)
Continue straight until armhole measures 19 cm.

Shape shoulders
Cast off 6 sts at the beg of the next 4 rows (23 sts)
Place remaining 23 sts on a stitch holder.

LEFT FRONT
With 5mm needles cast on 35 sts
K 2 rows

Commence pattern (corrections to rows 3, 5 & 7 made on 8th June 2011)Row 1: k2tog, k4, yon, k1, (yon, k4, sl1 k2tog psso, k4, yon, k1) 2 times, k4.
Row 2 and all even numbered rows: k4, purl to end.
Row 3: k2tog, k3, yon, k3, yon, k3, sl1 k2tog psso, k3, yon, k3, yon, k3, sl1 k2tog psso, k3, yon,k6.
Row 5: k2tog, k2, yon, k5, yon, k2, sl1 k2tog psso, k2, yon, k5, yon, k2, sl1 k2tog psso, k2, yon, k7.
Row 7: k2tog, k1, yon, k7, yon, k1, sl1 k2tog psso, k1, yon, k7, yon, k1, sl1 k2tog psso, k1, yon, k8.
Row 9: k2tog, yon, k9, (yon, sl1 k2tog psso, yon, k9), 2 times.
Row 11: k2, (yon, sl1 k1 psso, k5, k2tog, yon, k3) 2 times, yon, sl1 k1 psso, k7.
Row 13: k3, (yon, sl1 k1 psso, k3, k2tog, yon, k5) 2 times, yon, sl1 k1 psso, k6.
Row 15: k4, (yon, sl1 k1 psso, k1, k2tog, yon, k7) 2 times, yon, sl1 k1 psso, k5.
Row 17: k5, (yon, sl1 k2tog psso, yon, k9) 2 times, yon, sl1 k2tog psso, yon, k4.
Row 19: k3, (k2tog, yon, k3, yon, sl1 k1 psso, k5) 2 times, k2tog, yon, k6.
Row 21: k2, (k2tog, yon, k5, yon, sl1 k1 psso, k3) 2 times, k2tog, yon, k7.
Row 23: k1, (k2tog, yon, k7, yon, sl1 k1 psso, k1) 2 times, k2tog, yon, k8.
Row 25: k2tog, (yon, k9, yon, sl1 k2tog psso) 2 times, yon, k9.
Row 27: k12, yon, k2tog, k10, yon, k2tog, k9.
Row 28: k4, purl to end.
This completes the patterned section. Continue straight until work measures 27 cm, remembering to keep garter stitch button band correct.

Shape armholes and neck
Cast off 4 sts at the beg of the next row, k to last 8 sts, turn, leaving the last 8 sts on a holder.
Dec 1 st at neck edge , purl to end.
**dec 1 st at both ends of next 2 rows.
Dec 1 st at each end of next alt row. (16 sts)
Dec 1 st at neck edge only on next 4 alt rows. (12 sts)
Continue straight until the armhole measures 19 cm ending with the right side facing for the next row.
Shape shoulder
Cast off 6 sts at the beg of the next row.
Purl 1 row.
Cast off remaining 6 sts.

RIGHT FRONT
With 5mm needles cast on 35 sts.
K 2 rows.

Commence pattern
Row 1: k5, (yon, k4, sl1 k2tog psso, k4, yon, k1) 2 times, yon, k4, sl1 k1 psso.
Row 2 and all even numbered rows: purl to last 4 sts, k4.
Row 3 (buttonhole row): k2, yon, k2tog, k2, (yon, k3, sl1 k2tog psso, k3, yon, k3) 2 times, yon, k3, sl1 k1 psso.
Row 5: k7, (yon, k2, sl1 k2tog psso, k2, yon, k5) 2 times, yon, k2, sl1 k1 psso.
Row 7: k8, (yon, k1, sl1 k2tog psso, k1, yon, k7) 2 times, yon, k1, sl1 k1 psso.
Row 9: k9, (yon, sl1 k2tog psso, yon, k9) 2 times, yon, sl1 k1 psso.
Row 11: k7, (k2tog, yon, k3, yon, sl1 k1 psso, k5) 2 times, k2tog, yon, k2.
Row 13: k6, (k2tog, yon, k5, yon, sl1 k1 psso, k3) 2 times, k2tog, yon, k3.
Row 15: (buttonhole row): k2, yon, k2tog, k1, (k2tog, yon, k7, yon, sl1 k1 psso, k1) 2 times, k2tog, yon, k4.
Row 17: k4, k2tog, (yon, k9, yon, sl1 k2tog psso) 2 times, yon, k5.
Row 19: k6, (yon, sl1 k1 psso, k5, k2tog, yon, k3) 2 times, yon, sl1 k1 psso, k3.
Row 21: k7, (yon, sl1 k1 psso, k3, k2tog, yon, k5) 2 times, yon, sl1 k1 psso, k2.
Row 23: k8, (yon, sl1 k1 psso, k1, k2tog, yon, k7) 2 times, yon, sl1 k1 psso, k1.
Row 25: k9, (yon, sl1 k2tog psso, yon, k9) 2 times, yon, sl1 k1 psso.
Row 27: (buttonhole row): k2, yon, k2tog, k6 yon, k2tog, k10, yon, k2tog, k11.
Row 28: purl to last 4 sts, k4.
This completes the patterned border. Continue straight until work measures 27cm ending with right side facing for next row, and working another 2 buttonholes on the 11th row and following 12th row.

Place first 8 sts on a holder, continuing on the remaining sts, knit to end.
Cast off 4 sts at the beginning of the next row, purl to last 2 sts, p2tog. Complete from ** of left front, reversing shaping.

SLEEVES
With 5mm needles cast on 36 sts.
K 4 rows.
Stocking stitch 6 rows.
Increase 1 st at each end of next and 9 following 8th rows. (56 sts)
Continue straight until sleeve measures 47 cm.

Shape top of sleeve
Cast off 4 sts at the beg of the next 2 rows.
Decrease 1 st at each end of next 2 rows.
Decrease 1 st at each end of next 3 alt rows.
Decrease 1 st at each end of next 4 following 4th rows.
Decrease 1 st at each end of next 3 alt rows.
Decrease 1 st at each end of next 2 rows.
Cast off 4 sts at the beg of the next 2 rows.
Cast off remaining 12 sts.

MAKING UP
Neckband
Join shoulder seams.
With 4.5mm needles and right side facing, k across 8 sts on holder from right front, pick up and knit 36 sts up neck edge of right front, k across 23 sts on holder for back neck, pick up and knit 36 sts down neck edge of left front, k across 8 sts on holder from left front. (111 sts)
K 6 rows working a button hole at the beg of the 4th of these rows.
Cast off.

Sew in sleeves, join side seams and sew on buttons.

New Year Resolutions

I don't really make New Year resolutions - I rarely keep them. I find it's more important to welcome what opportunities come your way. This time last year I had no idea that I would be introduced to the world of blogging.

This was the major opportunity that came my way last year. I have always knitted and consider myself reasonably competent, but when I discovered all the wonderful knitting blogs and sites out there, especially Ravelry, it gave me confidence to take my skills further. 2009 was the year I discovered that I don't have to rely on patterns for knitting and crocheting - I can use my skills and experience to design my own. This has given me such a wonderful sense of achievement and a drive to improve and take things even further.

So if I am going to make a New Year resolution for 2010 it will be to design more - and sharing these patterns is one of the delights.

With this idea in mind, I finally used up the aran yarn that had been sitting around for some time. It had started to be knitted up as a Kim Hargreaves pattern, but I lost interest in this. It was nearly knitted to a Debbie Bliss pattern , but again, my enthusiasm waned. So I let the yarn do the talking, and designed this little cardi myself.


The pattern is called Charlotte (I was reading Charlotte Gray by Sebastian Faulks at the time I was knitting this). I used Debbie Bliss Donegal Aran Tweed and 5mm needles.
It has a scoop neck, a diamond border pattern around the edge of the body and plain sleeves.
It took no time at all to knit up and is very snug and versatile. It will be wearable throughout the year.

I'm pleased with the result, however, I knitted it up so quickly that I didn't write the pattern out properly as I went along. This has meant that I have had to spend longer typing up the pattern and checking it than it did to actually make the cardi!

The pattern will follow shortly.

Friday, 8 January 2010

Catching Up

We didn't have Internet access over Christmas and New Year, so any posts had to be done at the library. Thankfully we're back in action and I can hopefully catch up with all the projects I completed before Christmas. Here's a quick run through of the articles.

For Grace I made some fingerless gloves.

The pattern was Dragon Scale gauntlets by Anne-Marie Pearson. I made them slightly shorter than the pattern suggests - mid arm length, rather than elbow length. I used James C. Brett marble DK which gave a subtle colour change to the gloves. It was a nice pattern to follow and the gloves are lovely and warm. In the photo above we had to make sure we included Grace's interesting nail colours (red and greeen)!
For both Grace and Eve I crocheted necklaces.

I based these necklaces on a pattern I saw in Erika Knight’s book ‘Beads and Buttons’. I used oddments of 4ply yarn and sewed the beads on afterwards. Basically the necklace consists of 3 large flower shapes and 2 smaller rings joined together with a twisted cord at each end. Very simple but looks great.
Since Christmas I have knitted a cute bear from my 'Knitted Bears' book by Claire Garland. It is based on the bear called Marigold.
I used pink mohair 4ply yarn (the pattern called for DK weight) so the bear is slightly smaller than in the pattern. She's really cute and we've called her Rosie Bear. There are 7 other bears in the book - they all follow the same basic pattern but have an amazing choice of clothes. I may make some more as they definitely have great personalities.


I've started some new projects - so more on them next time. I thought I would be on top of these after the Christmas rush - but I never seem to quite get there. One day I will be organised!

Thursday, 7 January 2010

Barney Bat

It started with the hedgehog - I decided to make my own hedgehog because I found some feathery yarn in my stash, and Heidi Hedgehog was born.

I mentioned this to my cousin and she said "Can you do a badger?" This led to me devising my Boris the Badger pattern.

Eve just happened to mention to her friend Alice in school that I had made a hedgehog and a badger - "Can she do a llama?" Of course I can do llamas - Lionel the llama followed.

Word got round school about the llama and another friend asked if snails were possible. I didn't have to make my own pattern for Harold the Snail as I found a good pattern on the Internet.

When the snail made his appearance at school, a cry went up - "Can she do me a bat?" Thankfully I found a quick and easy pattern for a little bat by Shala.

Unfortunately the wings curl in ways they shouldn't and it was difficult to photo the little creature - but his new owner is very pleased with the result and that's all that matters.

Needless to say there was a rush of orders - could I do a unicorn! a golden retriever! I think I'll let things calm down a bit before I get involved with any more requests.

Saturday, 2 January 2010

Gordon Green and Sally Pickles

PDF version
Meet Gordon Green and Sally Pickles – two very colourful and lovable characters.


They are good friends and like to sit quietly together watching the world go by. So you can’t just make one – you have to make two!

Here’s how to make them.

Yarn – 4ply yarn (fingering weight) in whatever colour you fancy.
Hook – 2.5mm (US size B/C)
Notions – toy stuffing and scraps of felt for the faces.

PATTERN (English terms used)
dc (English) = sc (American)

Finished size – approximate body size is 10cm tall

Body
2 chain.

1st round: 6 dc (US = sc) into 2nd chain from hook. Join with a slip st into 1st dc.

2nd round: 1 ch, 2 dc into same stitch as chain, [2 dc into next dc] 5 times. Sl st into 1st dc. (12 dc)

3rd round: 1 ch, 2 dc into same stitch as chain, 1 dc into next dc, [2 dc into next dc, 1 dc into next dc] 5 times. Sl st into 1st dc. (18 dc)

4th round: 1 ch, 2 dc into same stitch as chain, 1 dc into next 2 dc, [2 dc into next dc, 1 dc into next 2 dc] 5 times. Sl st into 1st dc. (24 dc)

5th round: 1 ch, 2 dc into same stitch as chain, 1 dc into next 3 dc, [2 dc into next dc, 1 dc into next 3 dc] 5 times. Sl st into 1st dc. (30 dc)

6th round: 1 ch, 2 dc into same stitch as chain, 1 dc into next 4 dc, [2 dc into next dc, 1 dc into next 4 dc] 5 times. Sl st into 1st dc. (36 dc)

7th round: 1 ch, 2 dc into same stitch as chain, 1 dc into next 5 dc, [2 dc into next dc, 1 dc into next 5 dc] 5 times. Sl st into 1st dc. (42 dc)

8th round: 1 ch, 2 dc into same stitch as chain, 1 dc into next 6 dc, [2 dc into next dc, 1 dc into next 6 dc] 5 times. Sl st into 1st dc. (48 dc)

9th – 20th rounds: 1 ch, 1 dc into each stitch to end, sl st into first dc.

21st round: 1 ch, [dc2tog, 1 dc into next 6 dc] 6 times. Sl st into 1st dc. (42 dc)

22nd round: 1 ch, 1 dc into each stitch to end, sl st into first dc.

23rd round: 1 ch, [dc2tog, 1 dc into next 5 dc] 6 times. Sl st into 1st dc. (36 dc)

24th round: 1 ch, 1 dc into each stitch to end, sl st into first dc.

25th round: 1 ch, [dc2tog, 1 dc into next 4 dc] 6 times. Sl st into 1st dc. (30 dc)

26th round: 1 ch, 1 dc into each stitch to end, sl st into first dc.

27th round: 1 ch, [dc2tog, 1 dc into next 3 dc] 6 times. Sl st into 1st dc. (24 dc)

28th round: 1 ch, 1 dc into each stitch to end, sl st into first dc.

29th round: 1 ch, [dc2tog, 1 dc into next 2 dc] 6 times. Sl st into 1st dc. (18 dc)

30th round: 1 ch, 1 dc into each stitch to end, sl st into first dc.
Stuff the body at this point.

31st round: 1 ch, [dc2tog, 1 dc into next 1 dc] 6 times. Sl st into 1st dc. (12 dc)

32nd round: 1 ch, 1 dc into each stitch to end, sl st into first dc.

33rd round: 1 ch, [dc2tog,] 6times. Sl st into 1st dc. (6 dc). Fasten off and close opening.

Arms and legs (make 4)
2 chain
1st round: 6 dc into 2nd chain from hook. Join with a slip st into 1st dc.

2nd round: 1 ch, 2 dc into same stitch as chain, [2 dc into next dc] 5 times. Sl st into 1st dc. (12 dc)

3rd round: 1 ch, 2 dc into same stitch as chain, 1 dc into next dc, [2 dc into next dc, 1 dc into next dc] 5 times. Sl st into 1st dc. (18 dc)

4th – 6th rounds: 1 ch, 1 dc into each stitch to end, sl st into first dc.

7th round: 1 ch, [dc2tog, 4 dc] 3 times. Sl st into 1st dc. (15 dc)

8th – 9th rounds: 1 ch, 1 dc into each stitch to end, sl st into first dc.

10th round: 1 ch, [dc2tog, 3 dc] 3 times. Sl st into 1st dc. (12 dc)

11th round: 1 ch, 1 dc into each stitch to end, sl st into first dc.
Stuff the foot/hand lightly at this point.

12th round: 1 ch, [dc2tog, 2 dc] 3 times. Sl st into 1st dc. (9 dc)

13th – 18th rounds: 1 ch, 1 dc into each stitch to end, sl st into first dc.
Fasten off. Do not stuff the leg/arm – leave it flexible.

Attach arms to the sides of the body. Attach the legs to the base of the body, making sure that your little character can sit comfortably.

Using white felt cut two circles for the outer eye. Cut two smaller circles out of black felt then snip a small ‘V’ shape out of each one. Sew onto the face.

Using red felt cut a smiley mouth and sew this on to bring a smile to the face of your little character and also a smile to your own.


Wednesday, 30 December 2009

Snow Queen, socks and penguins!

It’s been a while – and there’s so much to catch up on.

Firstly, meet the Snow Queen.

Isn’t she wonderful? The pattern is by Alan Dart and it is featured in the January Edition of Simply Knitting magazine.

I skipped the funky fur edging and substituted a row of beads down the front of the jacket. For the crown I used a strand of double knitting yarn and a strand of lurex thread held together.

The pattern is easy to follow as detailed steps are given all along the way. The attention to detail in the character is lovely – she’s very majestic and eye-catching.

For Christmas I made socks for Grace and Eve. I used the same pattern as my first ever socks but this time I added buttons at the ankle for decoration.


The socks are very easy to make, relatively quick and lovely and warm to wear. They only use 1 ball of double knitting per pair – but I think I’ve done enough socks for the time being.

As little gifts at the dining table for everyone I crocheted these adorable penguins. I added gold thread loops to the top of each so that they can be hung on the Christmas tree.
The pattern can be found here. Unfortunately there are no English instructions – only charts in Japanese. The charts can be followed fairly easily – but I wouldn’t recommend them to beginners.

Well that’s enough to be going on with for now. There are still more finished projects to report – together with a work-in-progress update – but I’ll leave it at this for now.

Thursday, 24 December 2009

Snowflake Earrings

PDF version
Something special for Christmas - snowflake earrings. They’re very quick to make and fun to wear.

I used Coats mercer crochet cotton #30 and a 1mm hook.
Here’s how I made them:

Yarn – a small amount of white crochet cotton
Hook – 1mm.
Notions – earring hooks.

Pattern (English terms used)

Finished size – 3cm in diameter

Base ring: using white make 6 ch, sl st to join into a ring.

1st round: 1 ch , [1 dc (US =sc) into ring, 3 ch] 12 times, sl st into 1st dc. (12 spaces)

2nd round: sl st into 3 ch arch, 1 ch, 1 dc into same 3 ch arch, [3 ch, 1 dc into next 3 ch arch] 11 times, 1 ch, 1 htr (US =hdc) into top of first dc.

3rd round: [6 ch, 1 dc into next 3 ch arch, 3 ch, 1 dc into next 3 ch arch] 5 times, 6 ch, 1 dc into next 3 ch arch, 1 ch, 1 htr into htr which ended previous round.

4th round: 5 tr (US =dc) into next 6 ch arch, 5ch, sl st into 4th ch from hook (to make picot), 1 ch, 5 tr into same arch, 1 dc into next 3ch arch] 5 times, 5 tr into next 6 ch arch, 5ch, sl st into 4th ch from hook, 1 ch, 5 tr into same arch, sl st into top of 1st tr. Fasten off.


Attach earring hooks to one of the picots.
All done, now you can make your own statement for Christmas.
… And if you don’t feel like wearing them as earrings, they make rather nice tree decorations!

Monday, 21 December 2009

Happy Christmas

I feel like there's no time at all between now and Christmas - so blogging will have to take a back seat for a few days. I have so much I want to blog but no time to do it - once I get on the computer time seems to fly by and half the day has gone.

So I would like to wish every one

A VERY HAPPY CHRISTMAS AND PROSPEROUS NEW YEAR.

See in a few weeks time.

Saturday, 19 December 2009

Precious - finished

In no time at all, my beaded cardi is finished.


I'm very pleased with the result. The pattern is Precious by Kim Hargreaves from Heartfelt. I used Patons misty 4ply mohair (less than 3 balls used) instead of the Rowan kidsilk haze - I couldn't face using that yarn again.


The Patons misty was much easier to knit with, it knits to the same tension as kidsilk haze - I'd definitely use this yarn again (I've actually got 7 balls of the yarn left, so I will be using it again sometime!)

I made two modifications to the pattern. The first was not to include beads around the front edging - I would have been in danger of out-sparkling the Christmas tree - also I ran out of beads anyway - it takes a lot more than you realise. The second modification was to crochet around the front edging rather than pick up and knit over 200 stitches - much quicker and easier to manage with the crochet.
This will look lovely on Christmas day - very feminine and dainty.

Having finished that I've started the Snow Queen by Alan Dart - hopefully I'll have this finished in a few days - although she's bigger than you think. There's cricket on television during the day - England v South Africa test series - and darts - World Championship - in the evening. Plenty of knitting time.

I realised the other day, that with all these exciting must-knit projects I've been working on, I haven't done any housework for a while. That's the great thing about Christmas, it's a wonderful excuse to change your routine. Anyway, I spent Thursday with the vacuum cleaner and cleaned one of the bathrooms this morning - that clears up some of the guilt, so I can get back to the knitting this afternoon.

I have finally worked out why I don't feel organised at the moment - apart from the hectic Christmas excuse - I've lost my table! In the living room we have an octagonal table with a lovely, cheerful red gingham table cloth on it. Eve occasionally uses it for homework, Grace and Chris never use it, but I sit at it all the time. It is my place - the place where I write my lists, plan my day, knit and sew, read my books. But now it's gone - in order to make way for the Christmas tree the table had to be moved out into the garage. I miss it so much - now I have to sit on the sofa like everyone else - it's not the same - list-making just isn't as effective there. Well that's my excuse at the moment anyway.

Thursday, 17 December 2009

Snowflake

I had originally intended to crochet a number of snowflakes to stick on the walls. I found a pattern at MYpicot that had 7 different designs for Snowflake tree decorations.

Here's the one I made.
It's bigger than I thought it would be so more a doily than a tree decoration. I used Anchor crochet cotton #12. It took only a few hours to make but there are no written instructions just a chart. The chart was however very clear and matched exactly to the size of my work.

I will make more of these - but probably next year - the other designs are just as pretty. In a thicker yarn, maybe 4ply cotton, they would make lovely place mats for the Christmas table.

Tuesday, 15 December 2009

Harold the Snail and other business

Progress is being made, I am glad to say, on all my Christmas preparations. I'm nearly at the end of my list of secret makes - should be done by tomorrow. I still have other things I want to make but I don't have to wait until everyone is out of the house before I can get the needles and hooks out.

As a diversion (do I really need these?) I made a snail for one of Eve's friends. I'm not interested in re-inventing the wheel, so if there's a pattern already out there I'm happy to use it. I found an interesting pattern on Ravelry. Here is the snail, his name is Harold.


The pattern is Snails by Smeddley. It uses short row shaping to get the curves on the shell and body and is not too difficult to make. He's generously sized - approximately 3 inches long. He would probably benefit from a bit more colour - something bright and randomly-dyed would be an improvement.

As far as other projects are concerned, Precious is coming along nicely. It's very quick to knit and the Patons misty is so much better to work with than Rowan's kidsilk haze - and they knit to exactly the same tension.

Chris and I were away for a couple of days last week so I managed to get quite a lot of knitting done in the car. I should have this finished by the weekend.

After that I plan to start work on the snow queen. The Darts World Championship starts on Friday so plenty of evening knitting and watching over the next week.

Eve continues with her daily Advent surprise blog. Today's blog looks very tasty so I might post some pics to show you.

Monday, 14 December 2009

The 39 Steps

We had a great afternoon out on Saturday at the theatre. We went to the Playhouse in Liverpool to see The 39 Steps.
Here's the blurb about it:


Direct from the West End comes Alfred Hitchcock’s classic spy thriller, The 39 Steps, brilliantly and hilariously recreated by Patrick Barlow as the smash hit Olivier Award Winning Best New Comedy.

This blissfully funny show follows the incredible adventures of our handsome hero Richard Hannay, complete with stiff-upper-lip, British gung-ho and pencil moustache, as he encounters dastardly murders, double-crossing secret agents, and, of course, devastatingly beautiful women.

This wonderfully inventive and gripping comedy thriller features four fearless actors, playing 139 roles in 100 minutes of fast-paced fun and thrilling action.

It really was superbly funny - with a cast of only 4 it was amazing the way they managed to shift between characters. We'd definitely recommend seeing this play, if you get the chance.
After the play, I even managed to pop into John Lewis and buy the wool I need for the snow queen - so it was also a very productive day out!

Tuesday, 8 December 2009

Lauren

PDF version
Lauren is a close-fitting long-sleeved sweater in a textured fancy rib pattern. It is knitted in double knitting and is flattering and stylish.

To fit sizes small 32” (medium 36”, large 40”)
Knitted sizes
Bust 78 (88, 98) cm / 31 (35, 39) inches
Length to shoulder 53 (55, 57) cm / 21 (22, 22.5) inches
Sleeve seam 45 (47, 49) cm / 18 (18.5, 19) inches

Materials
10 (12, 14) balls of DK (I used James C. Brett Pure Merino double knitting in plum – 124 metres / 135 yards per ball)
3.75mm (US 5) straight needles

Tension
32 sts and 32 rows to 10cm (4 inches) measured over pattern using 3.75 mm needles. The fabric stretches horizontally. The tension is measured over the unstretched fabric.

Abbreviations
k = knit
p = purl
sts = stitches
sl = slip
tog = together
tbl = through back of loop
psso = pass the slipped stitch over

Fancy Rib pattern
Row 1: *p2, k1, p2, k3, repeat from * to last 5 sts, p2, k1, p2.
Row 2: *k2, p1, k2, p3, repeat from * to last 5 sts, k2, p1, k2.
Row 3: *p2, k1, p2, sl1, k2tog, psso, repeat from * to last 5 sts p2, k1, p2.
Row 4: *k2, p1, k2, (p1tbl, k1, p1) all into next st, repeat from * to last 5 sts, k2, p1, k2.
These 4 rows form the pattern throughout.

Important note
The third row of the pattern decreases the number of stitches on the needles. This should be taken into account when increasing and decreasing at the ends of rows.

BACK

Using 3.75mm needles cast on 125 (141, 157) sts.
Work in fancy rib pattern for 20 (22, 24) rows.
Keeping pattern as set correct make the following decreases.
Decrease at each end of next row and 5 following 6th rows. 113 (129, 145) sts.

Work 5 rows without shaping.

Increase at each end of next row and 5 following 8th rows. 125 (141, 157) sts.

Continue straight until the work measures 34 (35, 36) cm.

Shape armholes
Cast off 5 sts at the beginning of next 2 rows. 115 (131, 147) sts
Dec 1 st at each end of next 6 (8, 8) rows
Dec 1 st at each end of following 5 (5, 6) alternate rows. 93 (105, 119) sts**
Continue straight until armhole measures 19 (20, 21) cm

Shape shoulders and back neck
Cast off 8 (9, 10) sts at the beginning of the next 6 rows.
Leave the remaining 45 (51, 59) sts on a stitch holder.

FRONT
Work as given for back to **
Work straight for 6 rows.

Divide for neck
Pattern 36 (39, 42) sts, turn. Leave the remaining 57 (66, 77) stitches on a separate stitch holder.
Decrease at neck edge on next 6 rows. 30 (33, 36) sts
Decrease at neck edge on next 3 alternate rows. 27 (30, 33) sts
Decrease at neck edge on 3 following 4th rows. 24 (27, 30) sts
Pattern without shaping until the front measures the same as the back to the beginning of the shoulder shaping, ending with RS facing for next row.

Shape shoulders
Cast off 8 (9, 10) sts at beginning of next and following alternate row. Work 1 row. Cast off remaining 8 (9, 10) sts.
Rejoin yarn to remaining 57 (66, 77) sts. Pattern across, placing centre 21 (27, 35) sts on a separate stitch holder. Working on remaining 36 (39, 42) sts only complete to match left side of neckline, reversing shaping.

SLEEVES
Using 3.75mm needles cast on 53 (61, 69) sts.
Work in fancy rib pattern for 12 rows.
Keeping pattern correct, increase at each end of next and 14 (16, 16) following 6th rows. 83 (93, 101) sts
Continue straight until sleeve measures 45 (47, 49) cm.

Shape armholes
Cast off 5 sts at beginning of next 2 rows. 73 (83, 91) sts
Decrease 1 st at each end of next 4 (6, 6) rows. 65 (71, 79) sts
Decrease 1 st at each end of next 4 (4, 6) alternate rows. 57 (63, 67) sts
Decrease 1 st at each end of 4 following 4th rows. 49 (55, 59) sts
Decrease 1 st at each end of next 4 alternate rows. 41 (47, 51) sts
Decrease 1 st at each end of next 4 rows. 33 (39, 43) sts
Cast off 3 sts at the beginning of next 4 rows. 21 (27, 31) sts
Cast off remaining 21 (27, 31) sts.


MAKING UP
Join right shoulder seams.

Neckband
With right side facing pick up and knit 31 (35, 39) sts down left side of front neck. Working the 21 (27, 35) sts on the holder at front of neck, k2 tog 5 (6, 9) times, k1 (3, 3), k2 tog 5 (6, 9) times.
Pick up and knit 31 (35, 39) sts from left side of front neck.
Working the 45 (51, 59) sts on holder from back of neck, k2 tog 11 (12, 14) times, k1 (3, 3), k2 tog 11 (12, 14) times. 96 (112, 130) sts.
Work 8 rows in k1 p1 rib.
Cast off in rib.

Join remaining shoulder seam.
Set sleeve into armhole.
Join side and sleeve seams.

Monday, 7 December 2009

Christmas Jar cover

As part of my Christmas knitting, one of the things I thought I would do was to knit a cover for a glass jar so that I could put sweets and chocolates in it. We do actually have lots of jars and bowls that would do for this purpose but there's nothing like knitting something trivial to make you feel creative and festive.

I used the same Sirdar Click DK yarn as I used for my crocheted letters and knitted in the round. It's just plain stocking stitch until you get to the 'neck' of the jar. I then did a row of eyelet holes and followed this with some ribbing. I finished off with a picot edged cast off. Finally I threaded a ribbon through the eyelet holes.

It looks quite effective, so if I find myself with any time to waste between now and Christmas, I may knit some more!

Now that Lauren is finished, I have started knitting Kim Hargreaves' Precious - this is what I want to wear on Christmas day. I started it last night and this is what I managed to get done in a few hours.

I'm using silver beads but I'm worried they might be a bit too conspicuous - OK for Christmas day but what about wearing it at other times? I think I'll have to become a party animal to make the most of it!

Sunday, 6 December 2009

Lauren Finished

Here it is - Lauren - my latest knitting design.
It is a close-fitting sweater in a textured fancy rib. I used James C. Brett pure merino double knitting wool which is lovely and soft, the end result is a snug sweater that isn't too bulky. The wool is also very reasonably priced.

The fancy rib pattern is derived from an old magazine that belonged to my Grandma, dating back to the 1940s. It is very stretchy and so well suited to the close fitting design.

It took me a few goes to get the sleeve sizing correct. Because the pattern is very stretchy in the horizontal direction it was difficult to gauge how many stitches to cast on and then, when and how many increases to make. Third time lucky I got it right. The sleeve head worked out beautifully - I used Pythagoras's' theorem to work out the sizing for this!

I will post the actual pattern in the next few days - I need to get the calculator out again to work out the instructions for the larger sizes.


Saturday, 5 December 2009

New Alan Dart pattern

I've found a replacement for the Alan Dart Gingerbread House pattern I wanted. It's the snow queen and it features in this month's Simply Knitting Magazine.


It's made with a mixture of textured yarns and I can't wait to give it a go. The finished doll is about 16 inches tall so She'll make quite an impressive decoration for Christmas.

Thursday, 3 December 2009

Christmas cards

Following on from the wonderful and inspiring blog from the other day, I spent an indulgent afternoon yesterday with paper, scissors, lace, buttons, stamps and lots of glue! Here's the mess I made over the floor.
And here is a card I made.


I'm so pleased with the result, although my photography doesn't do the card justice.
I used a Christmas tree card that folds out into a pyramid shape. I cut a piece of Christmas themed paper to cover the front, then added lace and ribbon. I found some old Christmas stamps in my collection and stuck these on thin coloured card that had been cut with a fancy edging. I added this to the card together with some buttons tied with embroidery thread. I think the finished result has a Victorian scrapbook feel to it.

Here are all 6 cards I made.


I really enjoyed making these and the idea could be adapted for birthday cards or other occasions. So thank you Cherry's Jubilee for the inspiration.

Tuesday, 1 December 2009

Little Santas and Interesting Blogs

Here are some little Santas I made as new decorations for this year.

They are crocheted and the pattern is Little Santa by SoL. They are quick to make but I didn't make a separate hat, as the pattern instructs, I just extended the head in the hat colour and then embroidered a round of chain stitch around the brim. They could be made into tree decorations, but I think these will sit on a shelf or window ledge somewhere.

When it comes to browsing on the Internet I'm not very adventurous - so for my Advent calendar Eve is giving me a new web address to explore each day. Today's address is Cherry's Jubilee. It's packed full of lovely cards. Here's a sample:
These letters cards are wonderful - another use for crochet letters?


Wow! What an inspiration! It makes my idea for this year's Christmas cards seem quite boring. Tomorrow I think I'll get the fancy papers, buttons, ribbons and lace out and have a go at something like these. I like the idea of incorporating Christmas stamps into the design (I must confess to being a stamp collector in my dim and distant past - so this will come in useful now).
I can't wait to see tomorrow's surprise blog, especially if it is as inspirational as today's.